
Games
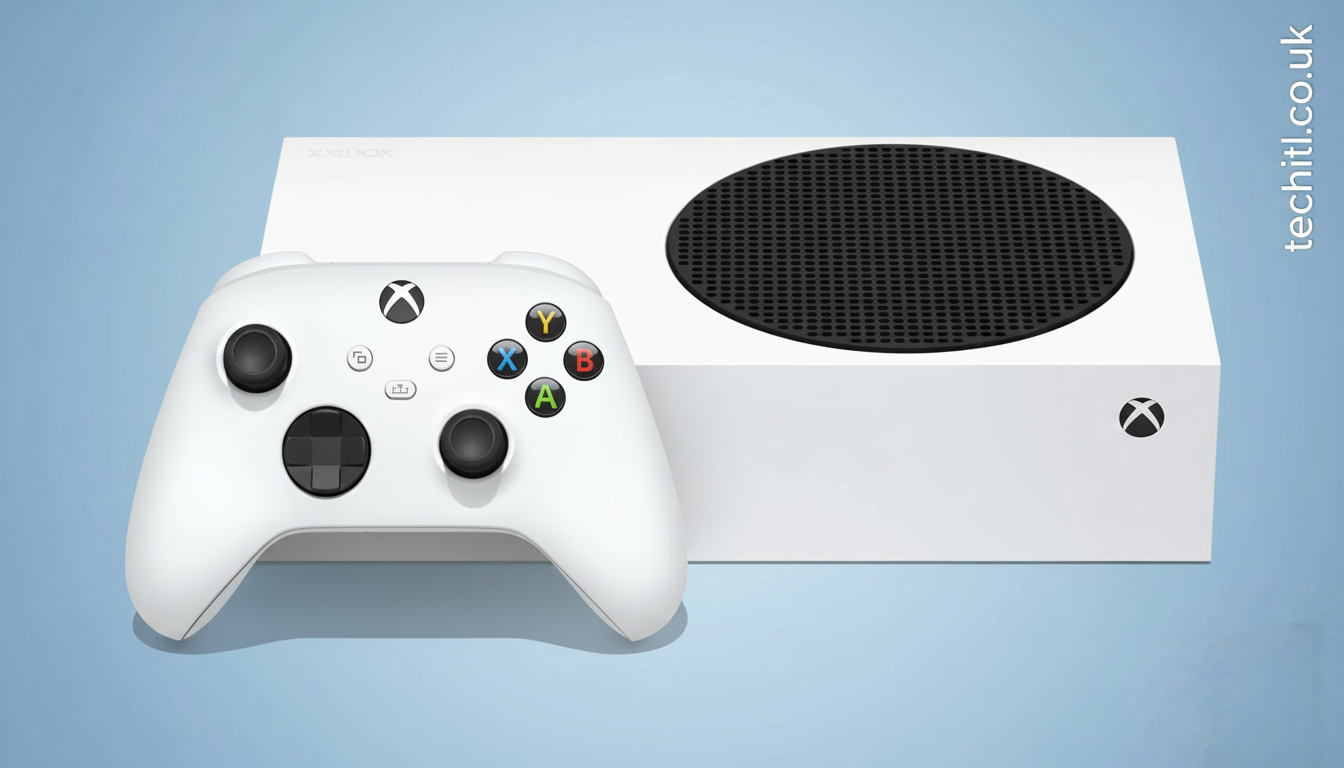
Wie man langsame Reaktionszeiten auf der Xbox Series X behebt – Der komplette Leitfaden
Einführung
Langsame Reaktionszeiten können selbst das beste Gaming-Erlebnis ruinieren. Sie drücken den Controller, aber die Aktion auf dem Bildschirm kommt zu spät – besonders frustrierend bei Shootern, Sport- oder Online-Multiplayer-Spielen. Viele Xbox-Series-X-Nutzer erleben dieses Problem, ohne genau zu wissen, woran es liegt oder wie man es beheben kann.
Die gute Nachricht: In den meisten Fällen lassen sich Verzögerungen deutlich reduzieren oder komplett beseitigen. In diesem umfassenden Leitfaden erfahren Sie wie man langsame Reaktionszeiten auf der Xbox Series X behebt, mit klaren, praxiserprobten Schritten. Egal ob Anfänger oder erfahrener Gamer – diese Tipps helfen Ihnen, das Maximum aus Ihrer Konsole herauszuholen.
Was sind langsame Reaktionszeiten (Input Lag)?
Reaktionszeit, auch Input Lag genannt, ist die Verzögerung zwischen Ihrer Eingabe (Controller, Tastatur oder Maus) und der sichtbaren Aktion auf dem Bildschirm. Selbst wenige Millisekunden können den Unterschied zwischen Sieg und Niederlage ausmachen.
Typische Anzeichen für Input Lag
- Verzögerte Schüsse oder Bewegungen
- Ungenaue Steuerung
- Probleme bei Online-Matches
- Schlechte Performance trotz starker Hardware
Häufige Ursachen für langsame Reaktionszeiten
Bevor wir erklären, wie man langsame Reaktionszeiten auf der Xbox Series X behebt, ist es wichtig, die Hauptursachen zu verstehen.
H3: Display- und TV-Einstellungen
Viele moderne Fernseher haben Bildverbesserungen, die zwar das Bild schöner machen, aber die Reaktionszeit erhöhen.
H3: Netzwerkprobleme
Hohe Latenz, schwaches WLAN oder instabile Server können Verzögerungen verursachen – besonders bei Online-Spielen.
H3: Controller-Probleme
Veraltete Firmware, leere Batterien oder Funkstörungen können Eingaben verlangsamen.
H3: Falsche Konsolen-Einstellungen
Nicht aktivierte Performance-Modi oder falsche Videoeinstellungen bremsen die Konsole aus.
Xbox Series X optimal einstellen
Game Mode aktivieren
Der wichtigste Schritt: Aktivieren Sie den Game Mode Ihres Fernsehers. Dieser Modus reduziert Bildnachbearbeitung und senkt den Input Lag erheblich.
So geht’s:
- Öffnen Sie die TV-Einstellungen
- Aktivieren Sie „Game Mode“ oder „Spielmodus“
- Deaktivieren Sie Extras wie Rauschunterdrückung oder Motion Smoothing
Video- und Anzeigeeinstellungen der Xbox anpassen
Optimale Videoeinstellungen
- Auflösung: 4K UHD (falls unterstützt)
- Bildwiederholrate: 120 Hz (bei kompatiblem TV)
- Variable Refresh Rate (VRR): Aktivieren
- ALLM (Auto Low Latency Mode): Einschalten
Diese Einstellungen sorgen für flüssige Bilder und schnelle Reaktionen.
Netzwerk optimieren für geringere Latenz
Ein stabiles Netzwerk ist entscheidend, wenn Sie wissen möchten, wie man langsame Reaktionszeiten auf der Xbox Series X behebt.
Kabel statt WLAN verwenden
Eine kabelgebundene LAN-Verbindung ist immer stabiler und schneller als WLAN.
Router richtig platzieren
- Möglichst nah an der Konsole
- Keine dicken Wände dazwischen
- Andere Geräte vom Netzwerk trennen
DNS-Einstellungen ändern
Öffentliche DNS-Server können die Verbindung verbessern:
- Google DNS: 8.8.8.8 / 8.8.4.4
- Cloudflare DNS: 1.1.1.1 / 1.0.0.1
Controller-Optimierung für schnellere Reaktionen
Firmware aktualisieren
Gehen Sie zu: Einstellungen → Geräte → Controller → Firmware aktualisieren
Kabelgebundene Nutzung
Für kompetitives Gaming ist ein kabelgebundener Controller oft schneller als kabellos.
Batterien prüfen
Schwache Batterien können Eingabeverzögerungen verursachen.
Hintergrundprozesse und Speicher verwalten
Apps im Hintergrund schließen
Streaming-Apps oder Downloads im Hintergrund können Leistung kosten.
Speicherplatz freihalten
Eine fast volle SSD kann die Performance beeinträchtigen. Halten Sie mindestens 15–20 % Speicher frei.
Spieleinstellungen anpassen
Viele Spiele bieten eigene Performance-Optionen.
Empfohlene Einstellungen:
- Performance-Modus statt Grafik-Modus
- Bewegungsunschärfe deaktivieren
- V-Sync nur bei Bedarf aktivieren
Diese Anpassungen verbessern die Reaktionsgeschwindigkeit deutlich.
System-Updates regelmäßig durchführen
Microsoft veröffentlicht regelmäßig Updates, die:
- Performance verbessern
- Latenz reduzieren
- Bugs beheben
Aktualisieren Sie Ihre Xbox immer auf die neueste Version.
Wann liegt das Problem nicht an Ihrer Konsole?
Manchmal liegt die Verzögerung an:
- Überlasteten Spielservern
- Schlechter Internetverbindung des Gegners
- Temporären Xbox-Live-Problemen
In diesen Fällen hilft nur Geduld oder ein Serverwechsel.
Häufige Fragen (FAQ)
Ist Input Lag bei der Xbox Series X normal?
Nein. Die Konsole ist sehr leistungsstark. Meist sind Einstellungen oder externe Faktoren schuld.
Hilft ein Gaming-Monitor?
Ja. Gaming-Monitore haben oft extrem niedrige Reaktionszeiten im Vergleich zu TVs.
Verbessert 120 Hz wirklich die Reaktionszeit?
Ja, bei unterstützten Spielen und Displays spürbar.
Zusätzliche Profi-Tipps für Hardcore-Gamer
- Nutzt einen Monitor mit <1 ms Reaktionszeit
- Aktiviert „Instant-On“ für schnellere Systemreaktionen
- Verwendet hochwertige HDMI-2.1-Kabel
Diese Feinheiten machen den Unterschied im kompetitiven Gaming.
Warum diese Maßnahmen wirklich funktionieren
Die Kombination aus richtiger Hardware, optimalen Einstellungen und stabilem Netzwerk reduziert jede unnötige Verzögerung. Genau deshalb ist es wichtig zu wissen, wie man langsame Reaktionszeiten auf der Xbox Series X behebt, statt nur ein einzelnes Problem zu lösen.
Fazit
Langsame Reaktionszeiten müssen kein Dauerproblem sein. Mit den richtigen Einstellungen, einem optimierten Netzwerk und einem gut konfigurierten Display können Sie das volle Potenzial Ihrer Xbox Series X ausschöpfen. Viele Nutzer unterschätzen, wie stark kleine Anpassungen die Performance verbessern können.
Wenn Sie diesen Leitfaden Schritt für Schritt befolgen, wissen Sie genau, wie man langsame Reaktionszeiten auf der Xbox Series X behebt – dauerhaft und effektiv. Das Ergebnis: schnellere Reaktionen, flüssigeres Gameplay und ein deutlich besseres Gaming-Erlebnis. Jetzt liegt es an Ihnen, diese Tipps umzusetzen und wieder ohne Verzögerung zu spielen. 🎮

Introduction
In the world of open-source gaming projects, Basket Random stands out as one of the most engaging and exciting developments on GitHub. Whether you’re a developer, gamer, or just someone curious about contributing to this fun basketball-themed game, exploring its GitHub repository is a great place to start. This guide will walk you through the process of understanding Basket Random, how to navigate its GitHub page, and ways you can contribute or customize the game for your own use.
With a growing community of developers and gamers, Basket Random continues to evolve, offering new features, updates, and improvements. If you’re interested in contributing to its development, or just want to understand how it works under the hood, GitHub is the best platform to explore. So, let’s dive into the exciting world of Basket Random GitHub and see how you can get involved in this dynamic project.
What is Basket Random?
Basket Random is a popular, fun-filled online basketball game where two players compete in a series of random challenges that test their skills and luck. The game is simple, yet highly engaging, as it features various elements of randomness, making each game unpredictable and unique. It’s a game that can be enjoyed by both casual and hardcore gamers, offering a competitive yet light-hearted experience.
On GitHub, Basket Random has gained significant attention due to its open-source nature. This allows developers to access the code, make improvements, or even create their own version of the game. The project is designed to be community-driven, and anyone with the right skills can contribute to its growth. GitHub’s version control and collaboration tools make it easier for developers to track changes, report issues, and add new features, making it a thriving hub for those interested in game development.
Navigating the Basket Random GitHub Repository
To get started with Basket Random on GitHub, the first step is to locate the official repository. GitHub’s search functionality makes it easy to find the project by simply searching for “Basket Random”. Once you’ve found the repository, here are the key sections you’ll want to explore:
Repository Overview
The repository’s main page gives you an overview of the project, its current state, and the most recent commits. It typically includes a description of the project, a link to the live game, and any pertinent information for new developers looking to contribute. This section may also include a README file, which often provides detailed information about how the game works, how to install it locally, and guidelines for contributing.
Codebase Structure
A key feature of the Basket Random GitHub repository is its well-organized code structure. The game is typically built using web technologies like HTML, CSS, and JavaScript. You can find the various components of the game, including the game mechanics, graphics, and backend logic, all neatly organized in different directories. Understanding this structure is essential if you’re planning to customize the game or contribute new features.
For instance, the assets folder might contain images and sound files, while the src folder could hold the core logic of the game. Reviewing the structure of the code will help you understand how everything works together, allowing you to contribute effectively.
Issues and Pull Requests
The Issues section is where you can report bugs, request features, or discuss problems you encounter while using or contributing to the game. If you find something that needs fixing, feel free to open a new issue and describe the problem in detail. Additionally, the Pull Requests section allows developers to submit their proposed changes to the code. If you’ve fixed a bug or added a new feature, this is the place where you can request that your changes be merged into the main codebase.
How to Contribute to Basket Random on GitHub
Contributing to Basket Random on GitHub isn’t as complicated as it may seem, even if you’re relatively new to GitHub. The following steps will guide you through the process of contributing your code and collaborating with the community:
Step 1: Fork the Repository
Before you can make any changes, you need to fork the repository. Forking creates a copy of the project in your own GitHub account, allowing you to freely make changes without affecting the original project. To do this, simply click the “Fork” button at the top-right corner of the repository page.
Step 2: Clone the Repository to Your Local Machine
Once you’ve forked the repository, the next step is to clone it to your local machine. This allows you to work on the project offline. Use Git to clone the repository by running the following command in your terminal:
git clone https://github.com/your-username/basket-random.git
Step 3: Create a Branch
Before making any changes, it’s good practice to create a new branch. This keeps your changes isolated from the main branch (usually called master or main). To create and switch to a new branch, use the following command:
git checkout -b new-feature
This creates a new branch called new-feature, where you can work on your changes.
Step 4: Make Your Changes
Now that you have a local copy of the repository and are on your own branch, you can start making changes. Whether you’re fixing a bug, adding a new feature, or improving the game’s user interface, this is the time to implement your changes. Be sure to test your changes locally to ensure they work as expected.
Step 5: Commit Your Changes
Once you’re happy with the changes, it’s time to commit them to your local repository. To commit your changes, run the following commands:
git add .
git commit -m "Added new feature"
This stages your changes and creates a commit with the message “Added new feature”. It’s important to write clear and concise commit messages to explain the purpose of your changes.
Step 6: Push Your Changes
Once your changes are committed, you need to push them to your GitHub repository. Use the following command to push your changes:
git push origin new-feature
Step 7: Create a Pull Request
The final step is to create a pull request. This is a request for the maintainers of the Basket Random repository to review and merge your changes into the main project. To do this, go to the “Pull Requests” section of the repository and click “New Pull Request”. Select your branch and submit the pull request.
Benefits of Contributing to Basket Random on GitHub
Personal Development
Contributing to open-source projects like Basket Random is a great way to improve your skills as a developer. By working on a real-world project, you gain practical experience and learn how to work with version control, collaborate with other developers, and tackle challenges that you might not face in personal projects.
Community Engagement
GitHub is home to a vast community of developers from all over the world. By contributing to Basket Random, you get the opportunity to collaborate with other like-minded individuals, share your knowledge, and learn from others. The Basket Random repository is a welcoming place for new contributors, making it an excellent starting point for those new to open-source development.
Building a Portfolio
If you’re looking to build your developer portfolio, contributing to popular open-source projects like Basket Random can be a great way to showcase your skills. GitHub contributions are often highly regarded by employers, and showcasing your involvement in a well-known project can help you stand out in the job market.
Troubleshooting Common Issues on Basket Random GitHub
While contributing to Basket Random on GitHub is relatively straightforward, you may encounter some issues along the way. Here are some common problems and their solutions:
1. Merge Conflicts
Merge conflicts happen when two developers make changes to the same part of the code. If this occurs, GitHub will ask you to resolve the conflict before proceeding. The best way to resolve merge conflicts is to carefully review both versions of the code and manually decide how to combine them.
2. Pull Request Reviews
When you submit a pull request, it will likely go through a review process. If the maintainers suggest changes, be sure to address them promptly. Sometimes, the changes requested may be minor, like adjusting the formatting or renaming a variable for clarity.
3. Testing Issues
It’s important to test your changes thoroughly before submitting them. If you’re unsure about how to run the tests or which tests are necessary, check the repository for any testing instructions or reach out to the community for help.
Conclusion
Exploring and contributing to basket random github on GitHub is an excellent way to get involved in the world of open-source game development. Whether you’re looking to improve your skills, join a community of passionate developers, or simply make a fun contribution to an exciting game, the GitHub repository offers the perfect platform for collaboration.
By following the steps outlined in this guide, you can start contributing to Basket Random today. With its growing community and ever-evolving codebase, there’s no better time to get involved in this project. So, head over to GitHub, dive into the code, and start making your mark in the world of open-source game development!
Games
DGH A Explained: A Complete, Beginner-Friendly Guide to Meaning, Uses, and Real-World Importance

Introduction
In today’s fast-moving digital and professional world, new terms and abbreviations appear almost every day. Some are technical, some are industry-specific, and others gain popularity because people keep searching for them online. One such term that has recently attracted attention is dgh a. Many people encounter it and immediately wonder what it means, why it is used, and whether it is relevant to their field or interests.
This article is designed to answer all those questions in clear, simple English. Whether you are a student, a professional, a researcher, or just a curious reader, this guide will help you understand dgh a without confusion. By the end of this article, you will know its possible interpretations, practical applications, benefits, and why so many people are searching for it today.
What Is DGH A?
At its core, dgh a is a term that can be interpreted differently depending on the context in which it is used. In many cases, it appears as an abbreviation, internal code, or shorthand phrase used within specific systems, documents, or digital platforms.
Unlike widely known acronyms, dgh a does not have one universal definition. Instead, its meaning often depends on:
- The industry using it
- The purpose of the document or system
- The regional or organizational context
This flexibility is one reason why people search for it frequently—they want clarity.
Why Is DGH A Gaining Attention Online?
Increased Digital Searches
Search data shows that niche keywords often gain traction when:
- They appear in official documents
- They are referenced in technical platforms
- They are mentioned in online discussions or forums
dgh a fits this pattern. As more people encounter it in digital environments, curiosity grows.
Confusion Around Meaning
Another reason for its popularity is uncertainty. When users see an unfamiliar term repeatedly, they naturally search for explanations. Clear guides like this one help bridge that knowledge gap.
Common Contexts Where DGH A Is Used
Administrative and Technical Documentation
In many organizations, abbreviations are used to save time and space. Dgh a may appear in internal reports, system labels, or reference codes. In such cases, it usually has a specific internal meaning known to the organization.
Digital Platforms and Databases
Some platforms use short identifiers or tags to categorize information. Dgh a may function as a label, filter, or reference point within a system.
Informal Online Usage
Occasionally, terms like dgh a appear in online conversations, notes, or shared documents where the full explanation is assumed but not written out.
How to Understand the Meaning of DGH A in Any Context
Look at the Source
The first step is always to examine where the term appears. Is it part of a formal document, a website, or a private message? The source often gives strong clues about its meaning.
Check Surrounding Information
Words, numbers, or headings near dgh a can help clarify its purpose. Context is key.
Ask for Clarification When Needed
If the term appears in a professional or official setting, it is always acceptable to ask for clarification. This avoids misunderstandings and errors.
Practical Uses of DGH A
Streamlining Communication
Short terms like dgh a help reduce repetition in long documents or systems. Once defined, they make communication faster and more efficient.
Improving Data Organization
In databases and software systems, short identifiers help organize large amounts of information. This makes searching, filtering, and categorizing data easier.
Supporting Internal Workflows
Within teams or departments, such terms often support smooth workflows by acting as quick reference points.
Benefits of Using Structured Terms Like DGH A
Saves Time
Once everyone understands the meaning, there is no need to repeat long explanations.
Reduces Errors
Clear, consistent use of terms helps avoid confusion, especially in technical or administrative tasks.
Enhances Efficiency
Well-defined shorthand improves productivity across teams and systems.
Common Misunderstandings About DGH A
Assuming a Universal Meaning
One of the biggest mistakes is assuming dgh a has the same meaning everywhere. In reality, its definition can change based on usage.
Ignoring Context
Without context, the term can be misunderstood. Always consider where and how it is used.
Overlooking Documentation
Many systems define their abbreviations clearly, but users often skip documentation. Taking a few minutes to read it can save hours later.
How DGH A Fits Into Modern Digital Practices
Role in Information Management
Modern digital systems rely heavily on abbreviations and codes. Dgh a is an example of how compact terms support complex processes.
Adaptability Across Fields
Because it is flexible, the term can be adapted to different needs without changing its structure.
Supporting Scalability
As systems grow, short identifiers help maintain clarity without cluttering interfaces or documents.
Best Practices for Using Terms Like DGH A
Always Define It First
When introducing dgh a in a document, define it clearly the first time it appears.
Be Consistent
Use the term consistently throughout the document or system to avoid confusion.
Keep the Audience in Mind
If your audience includes beginners or external users, provide explanations or a glossary.
Frequently Asked Questions (FAQ)
What does dgh a stand for?
The meaning of dgh a depends on the context. It may be an abbreviation, internal code, or reference term used within a specific system or organization.
Is dgh a an official term?
It can be official within certain environments, but it is not universally standardized.
Where is dgh a commonly found?
It may appear in documents, databases, digital platforms, or internal communication systems.
How can I find the correct meaning?
Check the source, review related documentation, or ask the relevant authority or team.
Why Clear Understanding of DGH A Matters
Misunderstanding a small term can lead to big problems, especially in professional or technical settings. By taking the time to understand dgh a, users can:
- Avoid costly mistakes
- Improve communication
- Work more confidently with systems and documents
Knowledge, even about small details, builds efficiency and trust.
Conclusion
Understanding specialized terms is becoming increasingly important in a digital-first world. Dgh a is a perfect example of a small term that can carry significant meaning depending on how and where it is used. Instead of guessing or ignoring it, learning its purpose within the right context can save time and prevent confusion.
As you move forward, remember that clarity always comes from context and communication. Whether you encounter dgh a in documents, platforms, or conversations, you now have the tools to understand it confidently. By applying these principles, you can navigate modern terminology with ease and accuracy.
Ever had a brilliant idea for a mobile game but dropped it because you didn’t know how to code? What if you could bring that idea to life without writing a single line of code yourself? It sounds like science fiction, but in 2024, it’s a reality. We’re going to explore how to build a mobile game with AI, using it as our programmer, artist, and sound designer.
This post is an experiment to see just how far we can push generative AI. Can we create a complete, playable mobile game by relying entirely on AI prompts? We’ll journey together through this process, transforming simple text commands into functional code and stunning visuals. Our toolkit will be straightforward: ChatGPT for the game’s logic and scripts, Astrocade as the game engine to piece it all together.
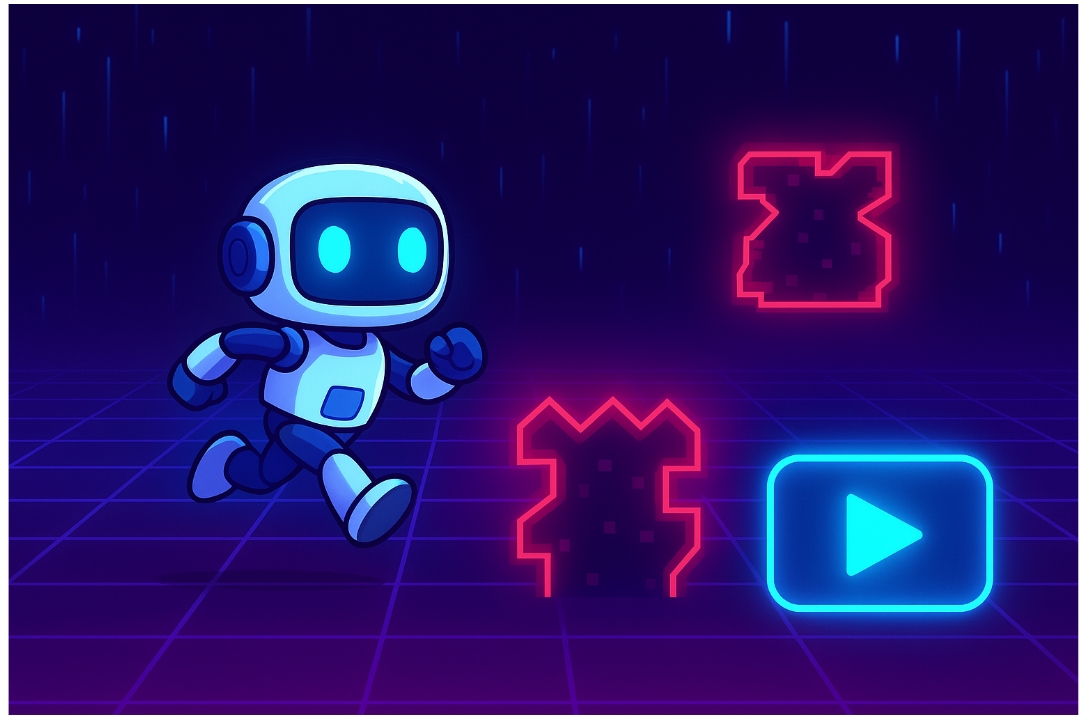
Our goal is to create a simple “Flow runner” game think Flappy Bird but with our own unique twist. By the end of this guide, you’ll not only see a game built from scratch but also understand the core principles of prompt engineering. This will empower you to start your own AI game development projects, regardless of your technical background.
Phase 1: Ideation and Game Design with AI
Every great game starts with an idea. But even ideation can be a hurdle. Instead of brainstorming in a vacuum, let’s ask our AI co-founder for help. We need a concept that’s simple enough for a first project but still engaging.
We’ll start by prompting ChatGPT for some game mechanics.
Prompt for ChatGPT:
“Generate 5 simple mobile game ideas that can be built by a beginner. The core mechanic should be a one-tap control. Focus on an endless runner or a similar hyper-casual genre.”
ChatGPT might suggest ideas like a bouncing ball avoiding obstacles, a rocket navigating an asteroid field, or a submarine dodging sea mines. For our experiment, we’ll go with a classic: a character that jumps to avoid obstacles. Let’s refine this concept.
Prompt for ChatGPT:
“Let’s expand on the endless runner idea. The game is called ‘Cyber Jumper.’ The player is a small robot jumping over oncoming digital obstacles in a cyberspace-themed world. The score increases for each obstacle dodged. The game gets faster over time. Outline the key components I’ll need: a player controller, an obstacle spawner, and a scoring system.”
With this, we have a clear design document. The AI has defined our character, setting, objective, and the essential programming components we’ll need to create.
Phase 2: Generating the Art Assets
A game is more than just code; it needs a visual identity. This is where AI image generators like Midjourney or Astrocade come in. We’ll use them to create all our game assets, from the character to the background.
Creating the Background
Our game, “Cyber Jumper,” needs a futuristic, cyberspace-themed background. For an endless runner, the background needs to scroll seamlessly.
Prompt for Midjourney:
“A seamless, looping 2D game background, cyberspace theme, neon grids, dark blue and purple, digital rain, vector art style, –ar 16:9”
Midjourney will generate a few options. We can pick the one that best fits our vision. The “seamless” and “looping” keywords are crucial for ensuring the background can repeat without any visible breaks.
Generating Sprites
Next, we need our main character (the “Cyber Jumper”) and the obstacles. These assets must have a consistent style.
Prompt for Midjourney:
“2D game sprite sheet for a small, cute robot character, simple design, side-scrolling view, multiple poses: running, jumping, falling. Plain white background. –ar 4:3”
Prompt for Midjourney:
“2D game sprite sheet of digital obstacles, red neon energy walls, sharp geometric shapes, pixelated barriers. Plain white background. –ar 4:3”
Using a “plain white background” makes it much easier to remove the background later. You can use free online tools like Photopea or Adobe Express to remove the background and export the sprites as transparent PNG files. This step is essential for layering them correctly in the game engine.
Phase 3: Writing the Code (The “No-Code” Part)
This is where the magic happens. We will prompt ChatGPT to write all the C# scripts needed for our game in Unity. You don’t need to understand the code, just where to put it.
First, you’ll need to install the Unity game engine. Once you have a new 2D project open, you’re ready to start building.
The Player Controller
The player controller script will manage the character’s movement. We need our robot to jump when the player taps the screen.
Prompt for ChatGPT:
“Write a C# script for Unity for a 2D player controller. When I press the spacebar or tap the screen, the character should jump. Add a public variable for jump force. The character should only be able to jump when it is on the ground.”
ChatGPT will generate a code block. In Unity, you’ll create a new C# script (e.g., “PlayerController”), copy-paste the code into it, and save. Then, you can drag this script onto your player character’s game object.
// Example of AI-generated code from ChatGPT
using UnityEngine;
public class PlayerController: MonoBehaviour
{
public float jumpForce = 10f;
private Rigidbody2D rb;
private bool isGrounded;
void Start()
{
rb = GetComponent<Rigidbody2D>();
}
void Update()
{
if (isGrounded && Input.GetKeyDown(KeyCode.Space))
{
rb.velocity = new Vector2(rb.velocity.x, jumpForce);
}
}
void OnCollisionEnter2D(Collision2D collision)
{
if (collision.gameObject.CompareTag(“Ground”))
{
isGrounded = true;
}
}
void OnCollisionExit2D(Collision2D collision)
{
if (collision.gameObject.CompareTag(“Ground”))
{
isGrounded = false;
}
}
}
The Obstacle Spawner
We need a system to continuously generate obstacles for the player to dodge.
Prompt for ChatGPT:
Write a C# script for Unity that spawns a prefab obstacle at a fixed position off-screen to the right. It should spawn a new obstacle every few seconds, with a randomized delay between 1.5 and 3.5 seconds. I will provide the obstacle as a public GameObject prefab.”
Copy this code into a new script called “ObstacleSpawner” and attach it to an empty game object in your scene. You’ll then drag your obstacle prefab into the designated slot in the Unity Inspector.
The Game Loop: Score and Game Over
Finally, we need to keep score and end the game when the player hits an obstacle.
Prompt for ChatGPT:
“I need two more scripts.
- A score manager script that increases the score by 1 every time an obstacle passes the player.
- A game over script. When the player’s collider touches an obstacle’s collider, the game should stop, and a ‘Game Over’ message should appear in the console.”
ChatGPT will provide the necessary scripts. You will attach them to the appropriate objects (a UI text element for the score and the player object for the collision detection). This completes our core game loop.
Phase 4: Troubleshooting with AI
The code won’t always work perfectly on the first try. This is where AI truly shines as a development partner. When you run the game in Unity and see a red error message in the console, copy the entire error message.
Then, paste it into ChatGPT with this prompt:
Prompt for ChatGPT:
“My Unity code is not working. I’m getting this error: [Paste the exact error message here]. Here is the script that is causing the problem: [Paste your full C# script here]. How do I fix it?”
Nine times out of ten, ChatGPT will analyze the error, find the mistake in the code it previously gave you, and provide a corrected version. This iterative process of testing and debugging with AI is fundamental to no-code game creation.
Phase 5: Polish and UI
A playable game needs a user interface (UI) and sound. We can generate these with AI, too.
- UI Elements: Use Midjourney to create a “Start” button and other UI graphics with a prompt like: “Futuristic ‘Start’ button for a mobile game, neon blue, minimalist UI element, plain background.”
- Sound Effects: Use an AI sound generator to create effects. A prompt like “A short, digital ‘jump’ sound effect” or “An 8-bit explosion sound for a game over” can produce usable audio clips.
Building Your Own AI Game
After assembling all the pieces, the art, the scripts, the UI, and the sounds, you will have a fully functional mobile game. Our “Astroman” is now a playable reality, built not with lines of code we wrote ourselves, but with carefully crafted prompts.
The process reveals a few key takeaways. Building the core mechanics was surprisingly straightforward. AI is excellent at generating self-contained scripts. The more challenging part was the integration, making sure all the different pieces worked together seamlessly within the Unity engine. Human oversight is still essential for assembling, testing, and refining the final product.
The true skill in this new era of development is prompt engineering. Knowing how to ask for precisely what you need is more important than knowing how to build it from scratch. Don’t be afraid to experiment. Take this guide as a starting point, dream up your own game, and see what you can create. Your next project is just a prompt away.

Projector Rentals: A Comprehensive Guide for Modern Businesses, Events, and Tech Users

How to Make Your Home Safer With Simple Renovation Projects

Top Benefits of Microsoft Dynamics 365 Customer Engagement for Business Growth

Miami Movers: A Comprehensive Guide to Professional Moving Services in Miami

Unlocking the Potential of MyGreenBucks Kenneth Jones: Your Ultimate Guide